This fabric was gifted to me from South America quite
some time ago. At first I really wasn't sure what to do with it. I loved
the striped sections with the supplementary wefts, but the solid bits
had me stumped.
I was also aware these fabrics were problematic. Definitely machine-made
rather than hand woven and also dyed with synthetic dyes rather than
traditional natural dye. Likely mass-produced and sold to tourists, also potentially damaging the traditional weaving culture of the area.
But gifted – and bought with love and thoughtfulness. There are some who think I then compounded the error by cutting them up and turning them into a quilt. I admit I also buy textiles on my travels – you've seen them here. I do try to buy directly from the maker who is making them currently (not selling family heirlooms out of desperate need) or from a cooperative that pays the maker fairly. There are plenty that I hang as is, as works of art, but lengths of cloth are for making. Hopefully always with respect, fair exchange, curiosity and a willingness to share the maker's story where I can.
These conversations are important though, and the destruction and appropriation of indigenous cultures is something to be considered and avoided at all costs.
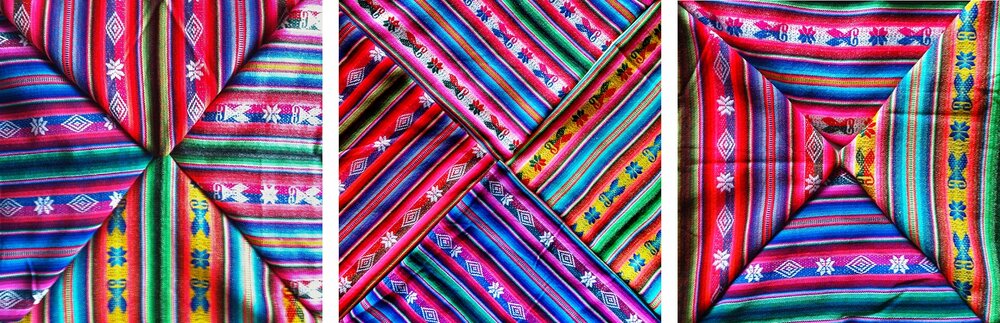
So, recognising these textiles are problematic, but having them under my stewardship, one day I got them out and started to fold them in various ways to see if anything appealed.
In hindsight, given the sashing I ended up adding, I might have been better going with the middle option, but hindsight is a wonderful thing, and I really wanted to go a bit freeform with this and not measure or fuss too much.
As you can see in the image below, I started by cutting off the outside bands of colour from each side of the centre strip. I then cut down the middle of the strip (ie down that band of dark green), and then cut right-angled triangles down the length.

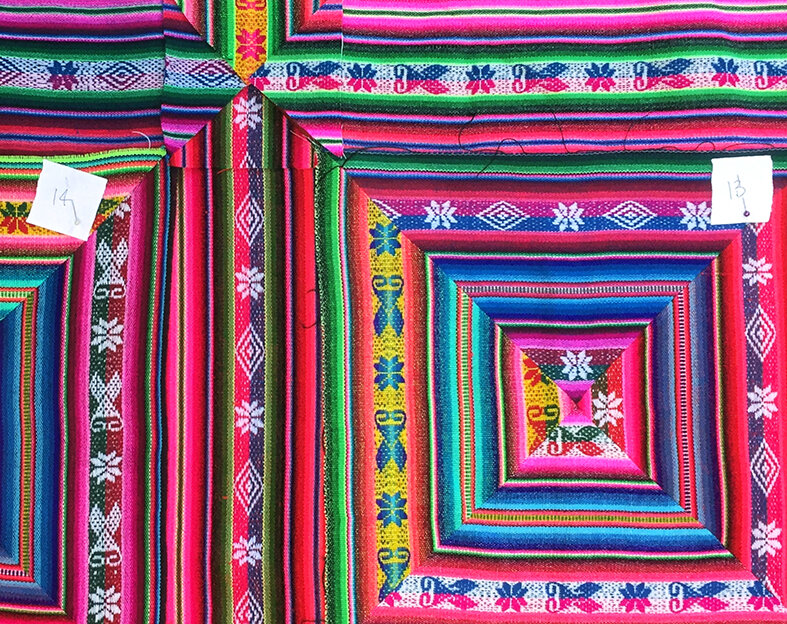
This is what all the triangles looked like before sewing them together. I should mention that the fabric was an incredibly loose wool weave, so to stop it unravelling I zig-zagged all the pieces. I then randomly chose triangles from different colourways to sew together,
with a rule that no colourway should appear twice in a square. Once I'd
sewn all the four-piece squares from the triangles, I realised the
quilt wouldn't be quite as big as I wanted it. My main issues were the
subtle differences in all the fabrics (even those of the same colourway)
in terms of stripe width, pattern direction and pattern placement, so
the finished squares ranged in size from 36cm (14.2") to 43cm (17")! If I
went with the smallest size I was going to lose a lot of quilt.

At this point, I knew I wanted to gift the quilt to the friend who bought the fabrics for me. She's a great traveller and I thought this would be a perfect reminder of all her amazing adventures, but with three years to go until her 50th, I stuffed the whole thing in a drawer and forgot about it.
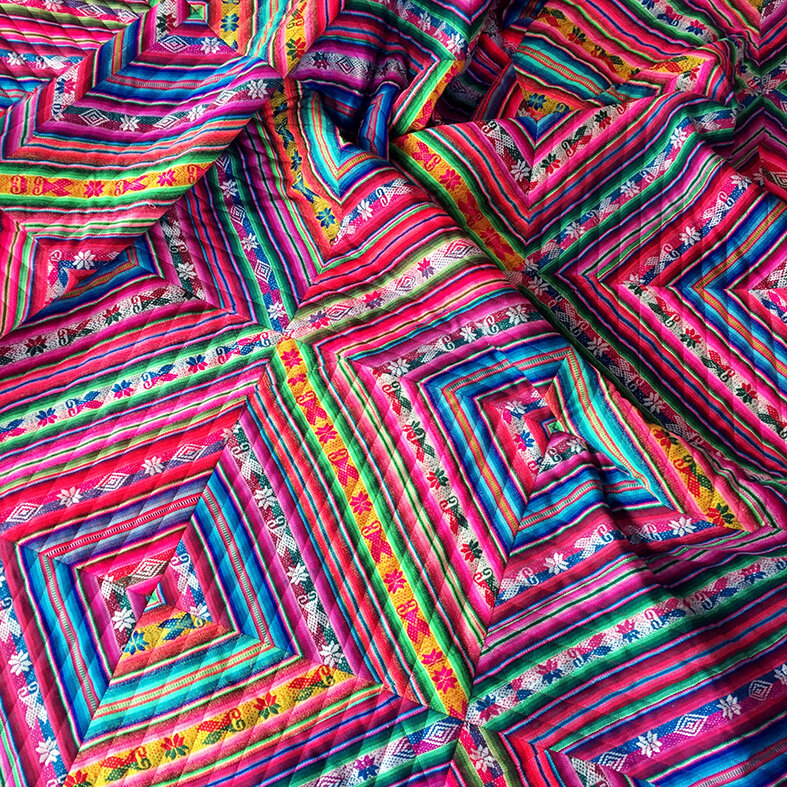
Another house move, and I realised I probably needed to get my act together, so it was back to the floor trying out sections from the discarded fabric to see what would work as sashing. I settled on using the wide stripe at the back of the cutting image above. As you can see from the pic below, it was going to take some careful matching to make sure I had the stripes in those small triangles the right way up for both the supplementary weft section (all correct in this image) along with its corresponding colours (incorrect in the image below). You can see the stripe in the right hand triangle is red at the top and pink at the bottom whereas the strip leading into it has pink at the top and red at the bottom.
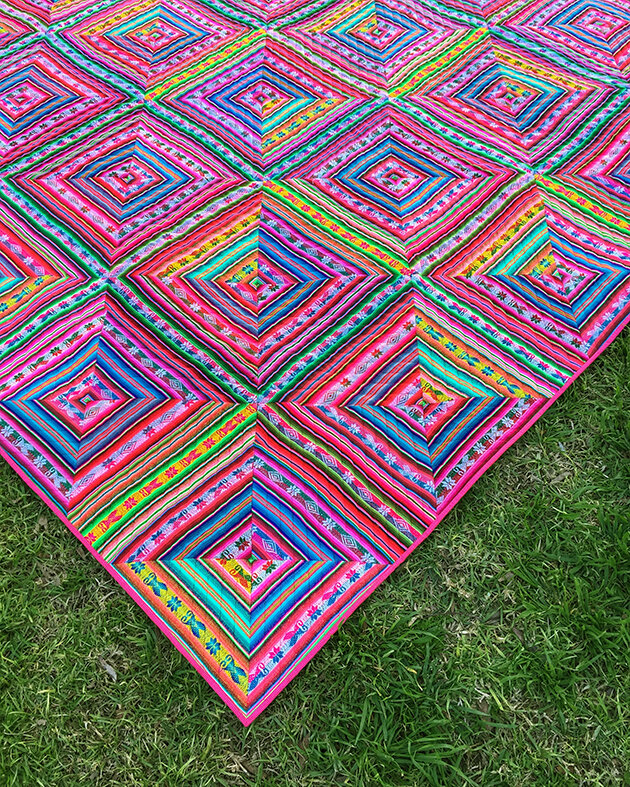
Despite the extra mucking around, it meant I could remove the smaller squares and deal with a five by five grid. They're pretty big shapes so the top came together quite quickly then. I obviously needed a lot of subconscious thinking time with this quilt rather than sewing time!
One thing I was sure of all along was how I wanted it quilted. There was no way I could do this kind of direction changing on my small Bernette, so off it went to Leanne at Mount Vincent Quilts. It came back exactly as I was hoping!
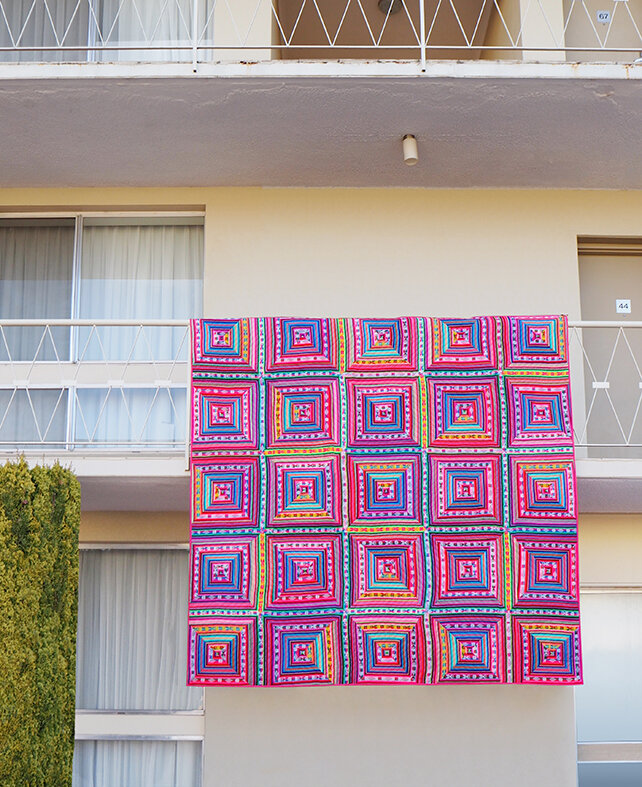
And there we have it! The finished quilt. If you pop on over to my
Facebook page you can even see it being gifted – my all-time favourite part of quilt-making. It's hard to believe after all this time, that I'm not going to have this half-done quilt hanging around anymore.
Do you collect fabrics on your travels? Have you made them into something, or like many of mine, are they still in a drawer? How do you choose the textiles you buy? Do you learn something about how they're made, about the maker themselves, or about the tradition it comes from?