
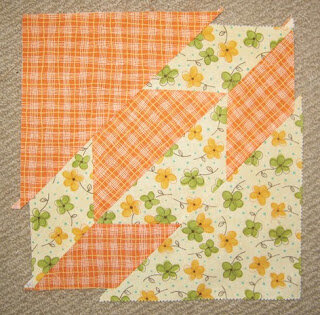
A finished square...
Sorry for the delay in posting. Work got hideous there for a bit. But I'm taking a few days off now, so I will add to the posts.
Here, finally, are the instructions for what a finished square should look like. You've all got enough fabric to be producing 8 of these (7 for Jen).
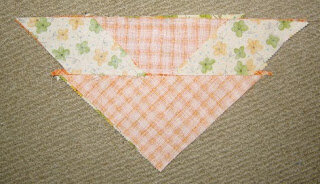
So, you have two halves done...

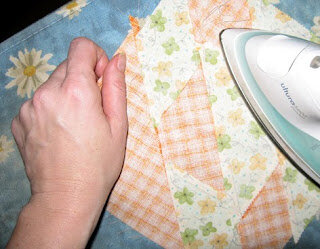
Once, you've sewn the pieces, you then need to iron them flat. Iron on the wrong side first. Iron the seam in one direction and pull the fabric away from the iron as you go. Then turn the square over and iron the again pulling the fabric away from the iron (pic below). You really need to do this with all the seam ironing as you go. Sometimes you can sew a small fold into the piece if the seams haven't been stretched out when ironed.
And, da-dah, there you have it, a finished square!
Here, finally, are the instructions for what a finished square should look like. You've all got enough fabric to be producing 8 of these (7 for Jen).
So, you have two halves done...
Place them, right sides together and sew quarter of an inch along the long edge of the triangle.
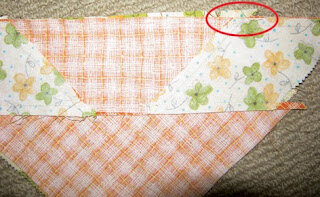
As, with other parts of this pattern, there might be a few wobbly bits. That's OK. As you can see in the pic below, the edges line up for most of the length, but there's one bit hanging out. When sewing keep to the straight, and ignore the hanging over (or under) area.
Once, you've sewn the pieces, you then need to iron them flat. Iron on the wrong side first. Iron the seam in one direction and pull the fabric away from the iron as you go. Then turn the square over and iron the again pulling the fabric away from the iron (pic below). You really need to do this with all the seam ironing as you go. Sometimes you can sew a small fold into the piece if the seams haven't been stretched out when ironed.
And, da-dah, there you have it, a finished square!